Thursday, January 29, 2009
Free Write: Self Reflect
I did something over the snow day that I am really proud of. Now what I'm about to say some people may not agree on in the beginning but by the end of this free write they will. I myself like to cook, and I am very good at it. Well over the brake I decided to make Split Pea soup. Now my mother told me to it wasn't a conscious choice she felt she didn't want me to be at home all day and do nothing but play games. She figured it would take me all day but she was wrong. She gave me a list of directions. But they just turned into a disaster so I decided to do it my way and every one loved it.

Friday, January 23, 2009
Halftone "pop dots tutorial

Step1: Open your image. Put a selection around the image that you would like to put the pop dots effect behind.(inverse if you need to)
Step2: Press apple + J twice. Put a selection around layer 2.
Step3: Go under the select menu under motify and choose Expand. Enter 10 pixels and click OK.
Step4: Press D to switch your swatches to default colors. Option delete
Step5: Press the letter Q to enter quick mask mode. Go under the fillter menu under pixelate and choose color halftone and click OK.
Step6: Keep runing your fillter until you are satisfie with the results. Tap the letter Q to leave quick mask mode.
Step7: Option delete. deselect you image.
Tuesday, December 9, 2008
semi-Transparent Type Tutorial

Step1: Open the image of your choice. Press T to get the Type tool and enter your text.
Step2: Put a selection around your text. Hide your image by clicking on the eye icon. Click your image layer.
Step3: Press Apple+J. Add a drop shadow inner shadow and inner glow effect using your layer styles
Step4:Drag your originaltype layer into the trash.
Thursday, December 4, 2008
Painting away color tutorail
myversion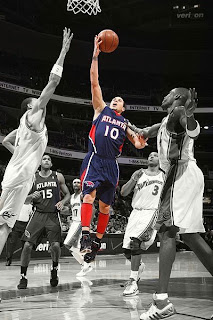
original

Step1: open the image you would like to work on.
Step2: Click on the brush tool. In the options bar switch the blend mode to color. Change your foreground color to black.
Step3:From the brushes pallete choose a medium sized,soft-edged(0% hardness) brush.
Step4:Start painting. As you paint, the color will disappear leaving your image in grayscale.

original

Step1: open the image you would like to work on.
Step2: Click on the brush tool. In the options bar switch the blend mode to color. Change your foreground color to black.
Step3:From the brushes pallete choose a medium sized,soft-edged(0% hardness) brush.
Step4:Start painting. As you paint, the color will disappear leaving your image in grayscale.
Wednesday, December 3, 2008
photoshop shortcuts
apple +u- Hue and saturation
apple t - free transform
option delete - change color of image to your forgeround color
apple j duplicate your layer
apple e - merge visible
apple f - run the last filter
apple+s-save
apple+n- new document
apple+v-paste
apple+c-copy
apple+a-selectall
b-brush tool
t-typetool
apple+thelayer- put a selection around the layer.
apple t - free transform
option delete - change color of image to your forgeround color
apple j duplicate your layer
apple e - merge visible
apple f - run the last filter
apple+s-save
apple+n- new document
apple+v-paste
apple+c-copy
apple+a-selectall
b-brush tool
t-typetool
apple+thelayer- put a selection around the layer.
Gold Crome tutorial
step 1 type your text , put a selection around your text
step 2 go under the select menu and choose save selection ,click okay,deselect your text , delete yor type layer
step 3 go to the channels pallette , click okay on alpha1, go under the filter menu under blur and choose gaussian blur enter 1 pixel
step 4 return to the layers palette and then click on the background layer , go under the filter menu render and choose lightening
Step 5 go under the image menu under adjustments and choose curves create a curve (input 186 output 64) click okay
step 6;go under the select menu and choose load selection choose alpha 1 from the channel pop up menu , then click okay go under the select menu under odify and choose expand enter 3 pixerls click okay
Step 7 press shift + apple +j click on the background layer press apple +a then press the delete button thn press deselect , then click on your text layer , choose drop shadow from the layers styles then click okay
step 8 choose color overlay from the layers palette change the blend mode to color overlay then click the color swatch
and then use the following R=208, then G= 165 B= 16 then click okay
step 2 go under the select menu and choose save selection ,click okay,deselect your text , delete yor type layer
step 3 go to the channels pallette , click okay on alpha1, go under the filter menu under blur and choose gaussian blur enter 1 pixel
step 4 return to the layers palette and then click on the background layer , go under the filter menu render and choose lightening
Step 5 go under the image menu under adjustments and choose curves create a curve (input 186 output 64) click okay
step 6;go under the select menu and choose load selection choose alpha 1 from the channel pop up menu , then click okay go under the select menu under odify and choose expand enter 3 pixerls click okay
Step 7 press shift + apple +j click on the background layer press apple +a then press the delete button thn press deselect , then click on your text layer , choose drop shadow from the layers styles then click okay
step 8 choose color overlay from the layers palette change the blend mode to color overlay then click the color swatch
and then use the following R=208, then G= 165 B= 16 then click okay
shadow in motion

step#1; tap the letter d, to change your foreground color to black. hold down the options key and tap the delete key, type our text using a medium gray color( 666666)
Step #2; duplicate your type layer by using the apple J shortcut, then raterize your layer
step#3; Go under the filter menu under pixelate , choose fragment run this filter two more times by using the apple F, shortcut
step#4; press apple T in the options bar change the width + the height to 130.
Step#5; click on your original type layer and raterize it , click on the top layer and press apple + e to emerge the 2 layers
Step#6; to colorize your type press apple u to bring up Hue/ saturation , then click the colorize checkbox and make the hue slider to the color you'd like
Subscribe to:
Posts (Atom)
